
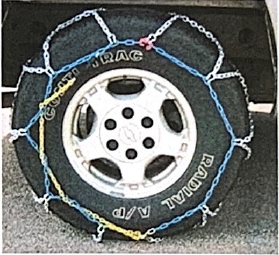
Fitting instructions for:
COMPACT GRIP/ GRIP 4X4
Step 1: Lay the tire chain on the ground in front of the tire, making sure to remove any kinks or tangles.

Step 2: Place the cable behind the wheel from the left side of the tire. Note: the yellow end should be on the left side of the tire.

Step 3: Lift the ends of the cable to the top of the tire. Connect the two ends and lay them on top of the tire.

Step 4: Connect the outer sides of the chain. There are three adjustable links- choose the link that best suits your tire.

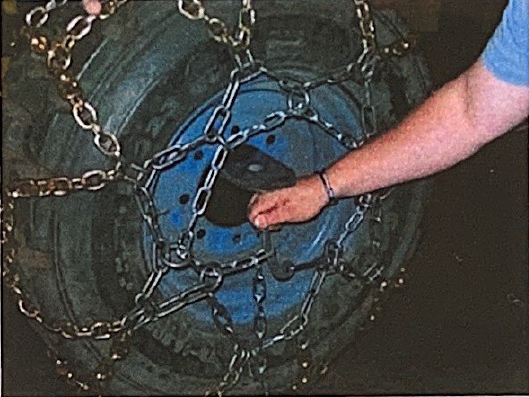
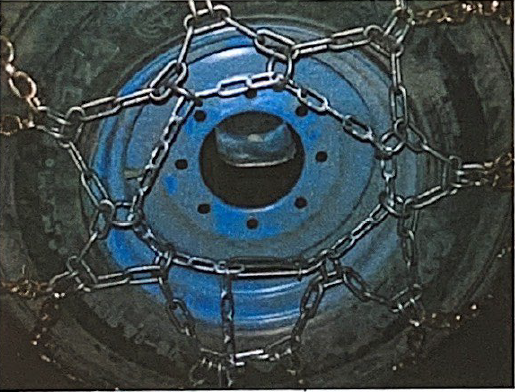
Step 5: Push the cable back to the backside of the tire. Center the cross chain on the tire.

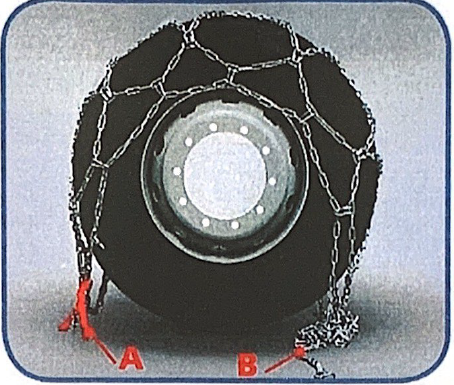
Step 6: At the bottom of the tire, run the yellow tension chain through the locking device, as shown.

Step 7: Pull tension chain tightly towards the direction it came from.

Step 8: Weave the excess tension chain through the blue side-chain until you’re able to connect the rubber end into the side chain. NOTE: The excess chain needs to be just snug enough to keep it in place. DO NOT put too much tension on the rubber connector.
Next: Pull the vehicle ahead 10-30 feet and re-tighten chains. When traveling great distances, you should check the tightness occasionally. Loose chains wear much quicker than a snug chain. The top recommended speed is 30-35 MPH.
To dismount chains: Position the wheels so that the connectors are located at the top and the tension chain is on the bottom.
Step 1: Unravel the excess tension chain from the side chain.
Step 2: Pull tension chain back through the locking system.
Step 3: Disconnect outer side-chain at the top of tire. (Do not let chain fall behind tires)
Step 4: Disconnect cable ends.
Step 5: Drive forward enough to allow for chain removal.
Step 6: Remove chains and return them to carrying bag.
CAUTION: These chains are designed for use and travel on snow and ice. These chains are not intended for plowing.
HOWY SKID STEER
Step 1: Lay the chain out straight, so the inside side chains are closest to the tire. Be sure the side hooks are facing up. Check the chain and eliminate any twists.

Step 2: Grasp the side chain nearest the tire by the center and drape over the tire. Tuck ends with attachments of the chain under tire tread. Move vehicle slowly in the direction away from the attachments until the attachments are rotated to the 5 o’clock position. Connect the inner side chain into the quick hook.

Step 3: Fasten the outside quick link into the side chain. You may need to squeeze the cross chain hook as shown to ensure a snug fit.

Step 4: Pull the tension chain tight and hook fastener through the chain as shown.
Step 5: Secure tension chain fastener.
Step 6: Weave excess chain and secure.

Olympia sprint
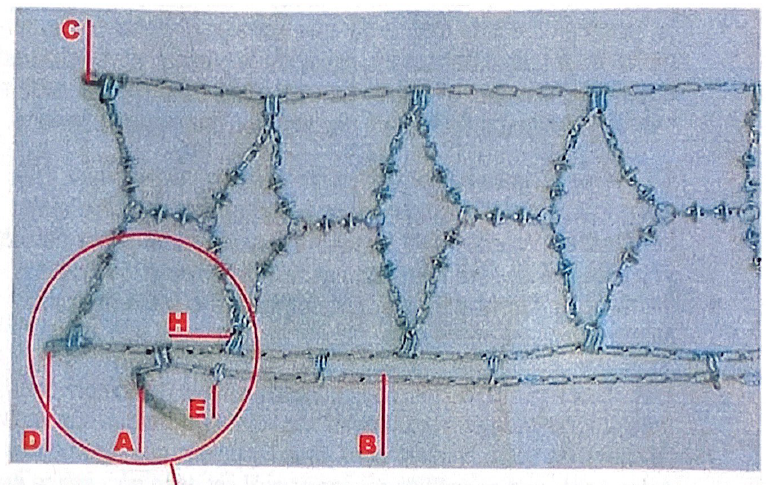


A- Tensioning lever
B-Tensioning Chain
C- Inner Closing Hook
D- Outer Closing Hook
E- Ring
F- Side Chain
G- Tensioning Handle
H- Double Hooks
Step 1: Lay the chain on the ground near the wheel, as shown in the photo and make sure that the double hooks (H) are facing the up position.

Step 2: Lift the chain and bring it toward the inside of the wheel, with the tension (A) and the tension chain (B) on the external side of the wheel.

Step 3: Lay the chain evenly on the tire.
Step 4: Move the vehicle forward for about 1/4 of a wheel turn.

Step 5: Hook the inner closing hook. (C)

Step 6: Hook the outer closing hook. (D)

Step 7: Pull the tensioning chain (B) as shown in the photo.

Step 8: Insert the tension chain (B) in the tension lever (A). Move the lever to the top and hook it to the proper ring (E) positioned on tensioning chain. (B)

Step 9: Finally, hook the tensioning handle (G) on the tension chain (B). After 100mt stop the vehicle, unhook the tensioning handle (G) and the tensioning lever (A) and repeat the phase 7, 8, and 9.

To Dismount:
Step 1: Stop the vehicle so that the chain is in the position shown in the picture.

Step 2: Unhook the tensioning handle (G) from the tensioning chain. (B)

Step 3: Unhook the tensioning lever. (A)

Step 4: Unhook the outer closing hook. (D)

Step 5: Unhook the inner closing hook. (C)

Step 6: Pull the outside chain downward.

Step 7: Move the vehicle and remove the chain.
