

The following fitting guide contains safety regulations and instructions that increase your safety and efficiency when assembling RUD Erlau tire protection and traction chains.
Preparations:
Check vehicle clearance (See Below)
Check tire and chain size
Check the tire pressure
Select a sufficiently large and level area
Remove any potential sources of danger
Lay out the required tools and check their function


Protective Equipment:
1. Helmet
2. Protective Glasses
3. Gloves
4. High Visibility Jacket
5. Safety Shoes

Parts Delivered With the Chains:

1. Lifting Chain

3. C-Lock

5. Shackle

2. Ring Lock

4. S-Hook

6. Locking Plate-easy2lock
Tools

7. Lift/Hoist

9. Compressed Air Hammer

11. Assembly Lever

13. Spanner

8. Punches

10. Assembly Aid (Ring Lock)

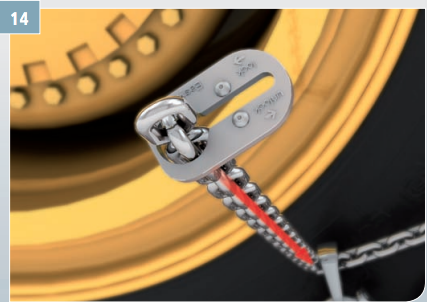
12. Magic Stick
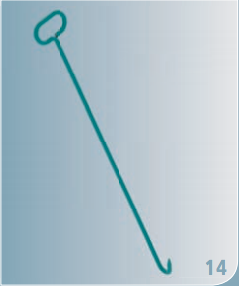
14. Mounting Hooks
Chain Components


Ring

Sidewall Link

Tension Chain
Assembly

1. Lay the chain with the wear side on the ground and pull it to make it as wide as possible.

3. Attach the fitting chain to the tire profile.

2. Move the wheel loader until the tire reaches the shown position.

4. Attach the S-hooks in at least three places, with the opening facing the tires. Start with the inner sidechain.

5. Slowly Reverse the chain.

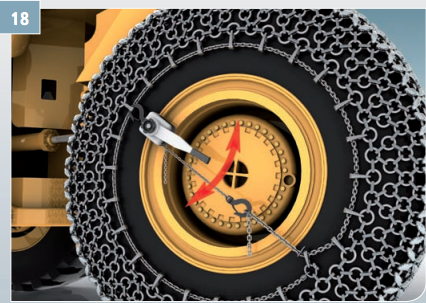
6. Raise the Chain.

7&8. Carefully center the chain with the assembly lever


Worn tires are an indicator that adjustments to the chain may be required. Achieving these adjustments are made by shortening the inner side chain, or the entire chain. Spread the shortening equally across the whole chain.
Shorten Chain


If shortening the side chain does not suffice, shortening the entire chain is then necessary. First, remove the chain, and when working with the cutting torch, do not heat neighboring parts, as this may reduce resistance to wear.
Ring Lock Assembly


Maintenance Service


Depending on its application, the chain has to be re-tensioned regularly.